Search blog

Sunday, November 1, 2020

[SOLVED] Suspend-Resume Not Working in Ubuntu 20.04

If you are unable to suspend your laptop, here's the solution which I've tried & tested and it worked with my Lenovo Thinkpad T440.

 Open your terminal and enter the following commands:

>> Steps 1: Create backup of the following file 'logind.conf':

 sudo cp /etc/systemd/logind.conf /etc/systemd/logind-backup.conf  

>> Steps 2: Depending upon the GUI based code editor you have, such as gedit, Geany etc or text based editor nano or the default vi enter the following command below. If you have & want to use Geany then you can replace vi with geany:

 sudo vi /etc/systemd/logind.conf  

 >> Steps 3: Step 3: Carefully navigate and make sure the following lines are changed to look like shown below. If the lines are commented (Example: #HandleSuspendKey=suspend), uncomment them.

 HandleSuspendKey=suspend  
 HandleLidSwitch=suspend  
 HandleLidSwitchDocked=suspend  

 >> Steps 4: Save the file.

 >> Steps 3: Reboot & check. You can reboot from the terminal using the following command:

 sudo reboot  


Sunday, June 28, 2020

[Solved] - How to Find Composer Name of Mageplaza Paid Extensions - Magento 2

How to Find, Extension Name of Mageplaza Paid Extension


Don't know why Mageplaza haven't still listed the composer name of their paid extensions. Look at the comment section of this tutorial: https://bit.ly/2Z9P7jC; you will see users asking for composer name, and still no solution is provided by them. Today I tried posting this solution as a comment in the aforementioned page, and each time my comment got deleted for reasons unknown to me. That's why I have decided to post this solution here.

[Solved] - How to Find, Extension Name of Mageplaza Paid Extension

The solution is very simple. Just download the extension, and look in the composer.json file. You will see a key/value pair entry as follows:
  "name": "mageplaza/module-search"  
Here module-search is the composer name of the paid extension Ajax Search for Magento 2.


NOTE: If you are installing Mageplaza extensions for the first time via composer, make sure to run the following command first:
 $ composer config repositories.mageplaza composer https://repo.mageplaza.com  

Monday, June 22, 2020

Setup WordPress CRON in Cloudways

In this tutorial, I will show you, how to Setup CRON in your Cloudways Hosting Account for WordPress.

1. First you will have to disable WordPress's default CRON.Check this tutorial by Kinsta to know how to do it: https://bit.ly/37RQjvW.

 // Disable WordPress Default CRON  
 define('DISABLE_WP_CRON', true);  

2. Log into your Cloudways account & go to the CRON Configuration page. You can do so by clicking on the following link: https://platform.cloudways.com/apps.


2. Select the App whose CRON you would like to setup.


3.1. Click on Cron Job Management
3.2. On the Cron Job Management page, click on ADVANCED
3.3. Add the following command to setup/enable Manual CRON.
NOTE:
  • Replace http://example.com with the name of your website
  • /5 signifies 5 minutes. You can replace it with 10 minutes or 15 minutes, if you are in a shared host
  • 2>&1 disables email notifications after each CRON run
 */5 * * * *   wget -q -O - http://example.com/wp-cron.php?doing_wp_cron >/dev/null 2>&1  

4. Finally click on SAVE CHANGES.

Manual CRON run should be setup in your site now.

You can install the WP-Cron Status Checker plugin to check whether CRON is running correctly or not.

Monday, February 17, 2020

Allow Clemetine Remote App Access in UFW [Uncomplicated Firewall]

If you would like to use the Clementine Remote App with your Ubuntu system, then try the following steps:

Allow Access to Clementine Remote App in UFW [Uncomplicated Firewall]
Image 1
 
Image 2
  1. Open Clementine
  2. Open Preferences using the keyboard shortcut (CTRL+P) or open on Tools >> Preferences from the Clementine menu
  3. Click on Network Remote tab on the left, and make note of the following two values:
    • Port
    • Your IP Address
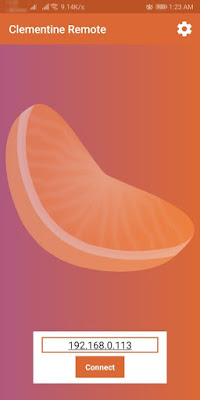
  4. In my case, my IP address was 192.168.0.113
  5. Open your terminal, and enter the following command:
    sudo ufw allow from 192.168.0.0/24 to any port 5500. Please note that if your IP is, say for example 192.168.1.20, then your terminal command should be as:
    sudo ufw allow from 192.168.1.0/24 to any port 5500
  6. Download the Clementine Remote app by clicking on the following link http://bit.ly/39CTNCo Play store. Now open the app, and you should be seeing a screen as shown in the Image 2 above. Enter your IP address & click on connect.
  7. Now you should be able to remotely access your Clementine music player from your Clementine Remote App

Top 5 Posts (Weekly)