Search blog

Showing posts with label Blogger Solutions. Show all posts

Friday, May 20, 2016

Redirecting a Naked Domain (non-www to www) to its WWW Version in Blogger/Blogspot

The steps below explains the procedure to redirect your naked domain to it's 'www version' such as, 'example.com' to 'www.example.com' for blogspot.

I also found an explanation in blogger at http://bit.ly/1TiXBis but that didn't help my case.

So, goto your domain host such as Godaddy or Netfirms. Then open the section called as 'Domain Name System', 'DNS Management' or 'DNS' etc in your Domain Control Panel.

Now look for a section called as Address Record aka 'A Record.'

Then open your terminal or shell and ping your blog address as below:

 ping www.example.com  

After pinging you should get an IP address as: '74.125.200.121'

Copy/Paste this IP address and paste it in the Value box of your A Record as shown in the image below:


Save and exit.

It should work now else please allow sometime, a few hours and check again.


Sunday, February 13, 2011

Unable to Access Blogger, Blogspot, Blog not Opening, DNS Error


Two days ago I faced a queer problem that I'd never faced in my whole 2 years+ experience of blogspot. Every time I entered my "blog-url" in my Firefox I would get the following errors:

"Problem loading Page....
Server not found
Firefox can't find the server at abc.blogspot.com............"

I freaked out ... WTF??? .. I even posted on my FB wall ... "Surprised to know that even a Service Provider like Google could experience downtime....." A chilling thought even ran into my mind ~ "Had Google blocked my blog?"

But after some "googling" and waiting I found out ~ All My Guesses Were Simply Wrong!!!! The problem had nothing to do with Google | Blogger. The problem lied with my ISP and the Dynamic IP assigned to me by my ISP (Internet Service Provider."

How I figured out the flaw was from my ISP and NOT Google?

I simply visited http://proxy.org/ and accessed my blog and Voila!!! I could access my blog quite conveniently. Then I called up my friend who works for IBM and asked him to check as to whether he could access my blog(s) from his home-computer. And again, YESsss he could. Again I used an IP changer software, which creates a "dummy IP" to conceal your IP. Here I changed my IP to Plano, Texas, US and again I could access my blog.

Now with all these test I became sure of the possible problem and it had nothing to do with Blogger | Google. The problem was with nobody but my ISP.

What can|should you do NOW?

Thursday, December 18, 2008

I can't find my blog on the Web, where is it?

N.B: The solution below are from Google Help. For more related solutions please visit: http://help.blogger.com/

I can't find my blog on the Web, where is it?

If you can't find your blog online and you're certain you (or one or your team members if you have a team blog) didn't delete your blog, then the first thing to do is make sure you've typed in the correct URL. If your blog is published with a custom domain or if you have an FTP blog, make sure you've correctly entered your settings in order for your blog to appear online.

The final thing to do is review Blogger's policies to see if you may have violated our Terms of Service. If you've typed in the correct URL, haven't deleted your blog yourself, and your FTP or custom domain settings are correct, then please contact us for further assistance.

Monday, December 15, 2008

Make Your Blog Load Faster:: Enhance Loading Time of Your Blog

Here are a few tips provided by blogger itself for enhancing and speeding the loading time of your blog.

The speed at which your blog loads is critical to attracting more readers to your blog. If your blog takes a long time to load, many readers may leave your blog before they have the chance to read it. Here are a few tips and tricks that will help your blog load faster and attract more users:

Posts

Your blog's load time can be affected by the number of posts you display on your main page. You can easily edit the number of posts displayed of the main page from the Settings | Formatting tab. You can then select the number of posts you want to display on the main page. We recommend displaying 10 or fewer posts on the main page.

Third Party JavaScript and Links

For optimal blog load speed, we recommend using Google/Blogger widgets, JavaScipt and links. However, if you need to use third party JavaScipt and links, your blog will load much faster if you put all JavaScript at the bottom of your blog. If you have third party JavaScript and links in your sidebar, put them in at the bottom of the sidebar.

Images and Media

The more images, videos and other multi-media you have on your blog the longer it will take to load. However, images and other multimedia are important to attracting users to your blog, so it is important to optimize the load speed of your images and media. Here are a few tips to increase the load speed of your media:

  • Decrease the size of your images or use thumbnails that link to the full-size image.
  • If you use third party images, consider uploading them to Picasa Web Albums via the Blogger post editor.
  • If you have a large number of images to display, you can upload all your images (from a vacation or event) to a Picasa Web Album and link to the album in your post or sidebar.

Other suggestions

  • If you've added any custom CSS to your blog, make sure you put it at the top of the page.
  • The most important content of your blog that catches readers attention should load the quickest. To help you identify which items are taking the longest to load you can use Stopwatch. To use Stopwatch, enter your blog's URL into the text box and click "Start StopWatch". Stopwatch will then open your blog in a frame and will record the time it takes for everything on your blog to load, including images, videos, widgets, etc. Take note of the items that take the longest to load and modify them appropriately using our suggestions.
Source: Blogspot Help

Monday, November 3, 2008

Publish Your Emails Directly In Blogger by Forwarding

I just discovered that you can actually forward any mails from your email account, especially the one's you like, and publish them directly or save it as a draft in blogspot. Isn't that a really nice thing. So, you wanna try them. Follow the steps below. It's damn easy...

Step 1: On your Dashboard please click on the Setting link.

Step 2: The Setting page will open. In the Setting page, please click on the Email Link as shown below in the image.

Please Click on the Image for an Enlarged View:


Step 3: The Email page will open where you can create your new blogger-email address, by
entering the address and saving the setting. Three are a few options which you need to
be wary of. Not to worry, I have described them in details below in the picture
Please Click on the Image for an Enlarged View:


Step 4: Once Step 3 is completed, you are ready for the final act. Immediately sign in to your email
account and start forwarding the mails you want to be published in your blogger
account.

Thursday, October 30, 2008

Methods to Recover Deleted Blogger Account

Blogs may get deleted in a number of ways. Once deleted a blog is not lost forever so do not panic. However it is always safer to backup your blogs regularly so that there is a fallback solution.

Also remember to backup your template and to backup your widgets template data as further insurance.

There are a number of solutions to recover deleted blogs............

How do blogs get deleted? This may occur in a number of ways :

1. Accidental clicking of "Delete This Blog" button at the bottom of Settings--->Basic subtab. ( Login at Blogger.com----->Click Settings link on Dashboard).

2. If you have contravened the Blogger TOS your blog may get deleted by them.

3. By hacking into your account. Make sure that you have a strong password and change it regularly to prevent this.

4. By deleting your Google Account. This does not delete the blog but deletes the Blogger service associated with your Google account and prevents access to your Blogger Dashboard.

5. Pseudo-Deletion. This happens when you cannot see your blog on the Dashboard after login at Blogger.com. You think the blog is deleted. Actually it is in another account. To locate it login with all the email addresses you have, one at a time. If you have forgotten the password get it reset via : http://www.blogger.com/forgot.g . If login is unsuccessful see the options at Checklist for Blogger Login problems.

    Changing Blog Address (URL) does not delete the blog. Your original address may be picked up by spammers also the new address will not get your old traffic. Hence changing the blog address is not advisable for old blogs.

RECOVER DELETED BLOG OFFICIALLY

To recover a deleted blog along with posts and comments you should provide information about your deleted blog by filling up the form here :

http://help.blogger.com/bin/request.py?contact_type=deletedblog


Blogger needs to identify your ownership of the blog before restoring it to you. You cannot request a URL deleted by someone else.


RECOVER GOOGLE ACCOUNT

If you have deleted your Google Account you can get it restored here :

http://www.google.com/support/accounts/bin/request.py?ctx=accounts_hc&contact_type=ara

Only after account is restored you can login at Blogger.com.

RECOVER MALWARE AFFLICTED BLOGS

If your blog has been deleted by Blogger first submit the official request at http://www.blogger.com/problem.g. If no intimation after 7 business days have passed you can submit request here :

https://spreadsheets.google.com/viewform?key=pZHHZdeYKeHgXlmtdMIRfbw&email=true


RECOVER POSTS AND BLOG URL

Deleted blog URLs are only available for reclaiming to the account which deleted them. Other accounts will get "Not Available" response when they request a URL inuse or a deleted URL. Even inactive URLs are considered as 'alive' and in use even though there may be no new posts on it.

To recover a deleted URL simply login to the account (Blogger.com) which deleted it. Click the Create a Blog link on Dashboard and type in same URL and follow the arrows to reclaim it. This will not recover your posts. To recover your posts go to Google.com and type in the search box :

cache:BLOG_URL

Replace the CAPS with your blog url/link/address. Click Search button. This will only work if your blog has been indexed by Google. It will not work with blogs which have been created and deleted within 2-3 weeks of their creation. You can then copy the posts and paste them in your reclaimed blog.

Lastly DO NOT DELETE YOUR BLOG IN ONE ACCOUNT SO THAT YOU CAN CREATE IT IN ANOTHER. Instead Transfer blog from one account to another by changing owner.

Also deleted blogs do not disappear from the Internet instantaneously. They stay in the Google cache as shown above. To totally remove them you have to submit request at Google Webmaster Tools after deletion :

http://www.google.com/webmasters/tools/removals

Source: http://betabloggerfordummies.blogspot.com

Wednesday, October 29, 2008

How do I post a video to my blog from YouTube?

How do I post a video to my blog from YouTube?

If you've got your own videos on your computer that you want to share on your blog, Blogger now allows you to upload video directly! If you'd like to share a video from YouTube, you can do that, too.

Embedding a YouTube Video

To embed a video from YouTube, just copy the code from the "Embed" box on the video's YouTube page. You can find the "Embed" box in the "About This Video" box when you're watching the video. You can also get the code from the "Embed HTML" box on the "Edit Video" page if the video belongs to your YouTube account.

To embed a YouTube video within a blog post, first click "Edit HTML" from within the post editor. Next, paste the video's code into the body of your post. That's it!

Set Up One-Click Video Sharing

If you post YouTube videos to your blog regularly, sharing directly from YouTube is even easier and you'll only have to set it up once.


  1. Click the "Share" button on the YouTube video's page

  2. Scroll down and click "Setup your blog for video posting."

  3. Click "Add a Blog/Site"

  4. Choose "Blogger" as your Blog Service and fill in your Google Account login information.

  5. Choose which blogs you'd like to add to your YouTube account. You can choose more than one.

  6. From now on, when you click "Share", you'll be given the option to post YouTube videos directly to your blogs!
Source: Blogger

How do I post a video to my blog?

If you already have a video on your computer, you can upload it to your blog as follows:


  1. Click the film strip icon on the post editor toolbar.

  2. In the popup window, click "Browse" to find the video on your computer.

  3. Enter a title for your video.

  4. Agree to the Terms and Conditions (if this is your first video upload).

  5. Click "Upload Video."

Frequently Asked Questions

Where are my videos hosted?

Videos uploaded through Blogger are hosted on Google Video.

Are my videos indexed or searchable?

No, your videos are kept private and will not be included in Google Video search.

How long does it take to upload and process a video?

Uploading a video may take a while, since videos tend to be very large files. However, the exact amount of time required will depend on the size of your specific video and the speed of your internet connection. The processing stage usually takes about five minutes. Blogger will display a status message below the post editor to let you know how this is going, and there will be a placeholder icon in your post to show where the video will appear.


Source: Blogger Features

How do I post pictures in Blogger?

How do I post pictures?

You can now upload photos to your blog(s) using Blogger Images; just click the image icon in the post editor's toolbar.
When you click this icon, you'll get a window that allows you to select an image or multiple images from your computer. Click the Browse button to locate the ones you want. Alternatively, you can enter the URL of an image that's already online and insert it into your post.
If you click the link to choose a layout, you can customize the way your images will appear in your post:
The left, center and right options determine how the text of your post flows around the pictures. The size option lets you scale the pictures to different sizes within this posting area. Note that the picture will still be uploaded in its full size; this option just determines how it's scaled within the content of your post.
Alternatively, you can post images to your blog using Mail-to-Blogger. This feature allows you to email posts with image attachments directly to your blog. For more information about Mail-to-Blogger, please see this article.

Related Articles:

Source:  Google Help

Monday, October 27, 2008

Display More Than 10 Posts In Blogger Main Page

Below are the steps by which you can display more than 10 posts in the main page of Blogger:

Step 1: In the Dashboad, please click 'Layout.'
 
Click on the image for Enlargement
Step 2: Click the Edit Link in the 'Blog Posts' box. (Check Figure above). Once you have clicked the 'Edit' link, a new pop-up menu called 'Configure Blog Post,' will open. Make the changes as described in the image below.

 Click on the image for Enlargement


Step3: Finally Save the Changes you have made. Open you blog to see the new change.

Sunday, October 26, 2008

How do I add the Following gadget to my blog?

Do you want to know who regularly reads your blog and develop a public fan base for your blog? Well now you can do that and more with the Blogger Following feature! In Blogger, users can publicly Follow any URL to tell the blog's author and the world they are a fan. With the Followers gadget, you can display your blog's Followers on your blog to show your blog's popularity and encourage more readers to stay updated with your posts.

How to add the Following widget to your blog

It's really easy to add the Following widget to your blog. First go to the Layout | Page Elements tab for your blog:

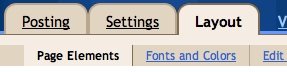
Click the "Add a Gadget" link that appears in the sidebar of your layout. You'll then see a popup window with all the different types of Gadgets you can add to your blog. (The Following widget will initially be experimental, so some users may not be able to add widget.) Look for the one called "Followers" and click on the blue "+" icon:

You can then enter your desired title for your Following widget. Once you have chosen a title, click the orange "Save" button. You have now added the following widget to your blog!

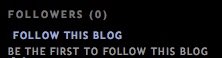
Readers can now go your blog and become a follower! Tell all your friends and grow your fan base. Once your readers become followers of your blog, their profile picture will be displayed in your Following widget.

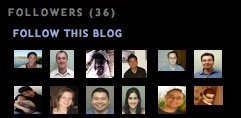
A running count of your followers will be displayed next to the blog name on your dashboard.

If you click the "Followers" link you will see a list of all your followers.

How to grow your audience with Following

The Followers widget is a great tool to help you grow your blog's audience. Readers often visit a blog and enjoy it but fail to return. With the followers widget you can get all readers to return and become a fan. We highly recommend that you write a post about your followers widget and encourage all readers to become a follower. Additionally you should put your followers widget at the top of your sidebar so more readers will notice it. Many readers ignore sidebar items so by writing a post about your followers widget and moving the widget to the top of your sidebar, you will inevitably grow your audience.


What is Blocking?

You have the option to block any of your followers by clicking the blue "Block" button. This will remove the user from your Following widget so their image will no longer appear on your blog. However, if your blog is public the user can still subscribe to your blog, read your posts and comment.

Related Articles:

Source: http://help.blogger.com/bin/answer.py?answer=104225

Tuesday, October 21, 2008

Generate More Traffic To Your Blog

Below are some more websites where you can promote your blog/website, for traffic generation:


Visit again for more updates!

Monday, October 20, 2008

Embed a Stat Counter to Your Blog\Webpage - By statcounter.com

What is STATCOUNTER?
A free yet reliable invisible web tracker, highly configurable hit counter and real-time detailed web stats. Insert a simple piece of our code on your web page or blog and you will be able to analyse and monitor all the visitors to your website in real-time!


  • Free, Fast, Responsive, Quick loading and Reliable Service. (Why is it free?)

  • Invisible Tracking - no ads on your website.

  • Accurate real-time website statistics with detailed visitor tracking and analysis.

Register Now - It's Free (We promise!)


Source: www.statcounter.com

Embed a Google Language-Translator in your blog/webpage:

Simply COPY & Paste the CODE below on your blog | website:

<!-- Start of Code for Google Translate -->

<div id="google_translate_element"></div><script>
function googleTranslateElementInit() {
new google.translate.TranslateElement({
pageLanguage: 'en'
}, 'google_translate_element');
}
</script><script src="//translate.google.com/translate_a/element.js?cb=googleTranslateElementInit"></script>

<!-- End of Code for Google Translate -->

Sunday, October 19, 2008

Advice on Blog Promotion

To make money from blogging demands you to have large traffic, and to have large traffic demands you to work on promoting your blog early on. Here are some pointers on promoting your blog.

1. Search Engines Take Time

New blogs will take a few months to get significant traffic from search engines. Doing SEO is one way to improve on this. Other traffic sources, such as networking or social media, can boost up your visitor numbers quickly if you have the right strategy – so don’t focus on search engines only.

2. All Traffic Are Not Equal

Responses from visitors to your blog in terms of time spent, depth of pages, interest in content are best if they found what they’re looking for. Generally, these kinds of visitors arrive at your blog from either search engines, subscribers, and from recommendation from other blogs with similar niche. Traffic from social media has been commented to be less responsive and even unlikely to return back to their blogs. Try to consider what type of traffic is best for you when promoting your blog.

3. Post Consistently

Most successful bloggers post consistently and regularly even when they already have large search engines traffic drawn to their older posts. The reasons for posting new content consistently are to grow the number of subscribers, get new pages in search engines, and keep the blog fresh to get votes in social media. So why stop when you can get more?

4. Traffics Are Inconsistent

There are days that traffic goes up, and at times down. It’s natural. Be ready for anything or you might get upset. The most important thing is to get your mindset focused and not let down by a few hurdles.

5. Get More Repeat Visitors

The heart of successful blogs is repeat visitors. Unique visitors are great too, but nothing can guarantee they’ll be back. So, it’s good to really focus on getting more subscribers. They are also the most responsive in terms of giving comments, votes, etc.

6. Get Inbound Links

Having other blogs link to you helps in many ways. They bring visitors in, expose your blog more, and boost your search engine rankings. These links also signify that your content is valuable, trusted, and worthy to pay a visit to. Not only they help with search engine traffic but also build your credibility.

7. Get Traffic from Multiple Sources

Getting huge traffic from one type of traffic, say search engines, doesn’t guarantee it will always stay that way. For example, Google penalizes blogs that violated their guidelines. Likewise, other types of traffic can’t guarantee giving you consistent traffic all the time. So, diversify your traffic sources.

8. Don’t Ignore Small Traffic

Traffics that come from resources such as your comment or forum links are relatively small. But most of the time those visitors find your blog to be very relevant to what they’re searching for and are likely to become loyal readers. So, keep them coming.

9. Build Your Network

To be successful in blogging, you must have strong network. People in your network can provide you valuable advice, link to you, vote for your posts, inspire and encourage you, and even become partners in future projects. To build a strong network you must first be proactive and willing to meet and help others.

10. You Can Buy Traffic

You can buy advertisement to drive traffic to your blog quickly. PPC ads can be efficient and inexpensive if you bid on the right keywords. StumbleUpon also offers an advertising option where you buy traffic at $0.05 per visitor. Running these ads for a few months will drive significant traffic and give you good exposure at low costs.

Saturday, October 18, 2008

Verify Your Site With Google for Better Search Engine Results

In case you haven't verified your site with Google, I recommend you to do that, as early as possible. Below are the detailed steps, which might assist you.

Step 1: Please visit Google Accounts:
Step 2: If you haven't registered with Google, please register and sign in. Else sign in with your Google id.
Step 3: Now in the My Account Page, look for My products. (look below.) Click on the Image to have an Enlarged View!                                


Step 4: Under the 'My product' group, look for Webmasters Tools and click on it.
Step 5: A page called 'Dashboard' will Open. (look below). Click on the image to have an Enlarged View and follow the instructions, mentioned in the image.


   End: Your site is finally verified. You can check for it in the Dashboard. Else allow the Google crawler sometime to crawl through your site and verify.

How To Display Codes Properly In Your Blog Post

If you would like to display codes for various tips and tricks, hacks or anything for that matter, for heling and sharing your information with fellow blogger; the article below might be handy for you.


HTML and Javascript codes perform different functions for our blog posts, such as changing the appearance of text like this. But when we need to display the actual code used to perform these functions, we can't simply paste this code into a post as it will perform the function, and not display as regular text.
 The two different ways you can post is by use of  blockquotes and iframes. In this post I'll explain how you can use these methods to display readable code in your own blog posts.

The problem when trying to paste code into your posts is that it will perform the intended function, rather than display as regular text. For example, if I wanted to explain how to make text italic, I could try adding this into my post:

<i>This is italic text</i>
But if I simply paste this code into a post, the effect will be this:

This is italic text
This is because the code is performing the function of the code I pasted, rather than displaying as readable text.
To display this code as text, we need to use "character entities instead.

What are "character entities"?

You could say that HTML uses a special language, and that we need to say things in a different way for a web browser to understand it. Character entities make the browser understand that we want to display a certain character, rather than use the function of this character.
Character entities are made up of three parts:

  1. An "ampersand" (the & symbol)
  2. Either a descriptive phrase, or a # followed by a number
  3. A semicolon (the ; symbol)
Here is an example of the character entity for the © (copyright) symbol:

©
This example uses the descriptive phrase "copy", though it could also be used with the # and it's number instead:
©
Either of these methods will have the effect of reproducing the © symbol in your blog post (or in any web page for that matter!).

The most common character entities you will need to use

Here are the most common characters and their equivilent character entities you would need to use to display code in your posts:


Result Description Entity Name Entity Number
< less than < <
> greater than > >
& ampersand & &
" quotation mark " "
For a complete list of character entities, take a look at the reference page provided by W3 Schools.

Using the character entities

In the code you would like to display, you will need to substitute each of the HTML characters above with the equivalent character entity. For example:

<i>This is how to display italic text</i>

Should be written instead as

&lt;i&gt;This is how to display italic text&lt;/i&gt;

This is more commonly known as "escaping" the HTML code.
You could write these character entities by hand each time you need to display code in your blog posts. However, I find it easier to use the "replace" function in Notepad to replace each instance of a certain character with the equivalent character entity. Alternatively, you could use the free HTML code parser tool provided by BlogCrowds which can substitute all necessary characters for you in one click!

Displaying the "escaped" code in your blog posts

As I mentioned right at the beginning of this post, I use two different methods to display code in my posts: blockquotes and Iframes (inline frames).

Blockquotes

Blockquotes are useful if you only need to display a small section of code. Usually, your blog template will indent any content which is enclosed in

tags; sometimes styling will also be used, such as a different colored background or border.

To display your code as a blockquote, you will need to use the following format:
<blockquote> Your content/"escaped" HTML code goes here </blockquote>

Iframes

Iframes (inline frames) are more useful to display long sections of code, such as the template codes displayed in the Templates section of this blog. They are used to display the content of an external file in the body of a page, and can be used to display a large amount of content in a small amount of space. If the dimensions of the iframe are smaller than those of the content it contains, the iframe will have scrollbars so your readers can access the whole content.
Unfortunately iframes are slightly more difficult to create than blockquotes as the content of the iframe must be externally hosted; it is not a part of the page itself.
To create the content of an iframe, you will need to create an HTML file containing your "escaped" code. Don't worry about adding all the elements of a regular web-page, such as the head and body tags: the easiest way to create the HTML file is to paste your escaped HTML code into your favorite text editor (such as Notepad) and save this with an ".html" extension.
You will then need to upload this to your hosting account, and note down the URL of this HTML file. If you don't already have an external hosting account, check out this post to read about some of the best free hosting providers.
Once you have uploaded your HTML file to an external host, you will need to call the iframe in the body of your blog post. To do this, you can use the following format, substituting the example URL for that of your HTML file:
<iframe src="http://hosting-provider.com/your-file.html"><iframe>
You can then preview your blog post to ensure the code displays correctly within the iframe.If you prefer, you can also specify the dimensions of the iframe to ensure it doesn't stretch too far down or across the page in your post like this:
<iframe src="http://hosting-provider.com/your-file.html" width="400px" height="200px"><iframe>
I hope this explanation helps you to display code correctly in your own blog posts.

Show Only Post Excerpt In The Home Page

Instead of displaying the whole post in the homepage you can simple display, only some excerpts from your article; and write 'Read more...,' instead. In this way when they click 'Read More' the complete article will be displayed. It gives a professional look to your page.

Login to your account and click on the “Layout” tab. Then select “Edit HTML”. Check ” Expand Widget Templates”.
Now search for </b:skin> and paste the below code between </b:skin> and </head>


<!-- Style to implement "Read more.." link in all the posts (Start) -->
<style>
    <b :if cond='data:blog.pageType == "item"'>
        span.fullpost {display:inline;}
    <b :else/>
        span.fullpost {display:none;}
    </b></style>
<!-- Style to implement "Read more.." link in all the posts (End) -->

Now search for <data:post.body/> in the template HTML and paste the following piece of code after <data:post.body/>


<!-- Code to show "Read more.." Link (Begin) -->
          <b :if cond='data:blog.pageType != "item"'>
              <span>
                <a expr:href='data:post.url' 
style='color:#0000FF; 
text-align:right;
font-weight:bold; 
text-decoration:none'>
Read more..</a>
             </span>
          </b>
          <!-- Code to show "Read more.." Link (End) -->

Save it. That’s all about coding part of the theme. To show only post excerpts on the homepage, you need to insert <span class="fullpost"> post excerpt.Remaining article will be shown after clicking on "Read more.." link.</span> . Now your articles and blog will look more professional.

Friday, October 17, 2008

Schedule Your Future Posts in Blogger:

Suppose you plan to go out for sometime, say a couple of weeks, and you will not be having any access to blogger. What will you do then? Do you know that in your absence too, you can continue to post articles in Blogger. You just have to prepare all those articles that you would like to publish in your absence and then pre-publish it. And when the right time comes, even in your absence blogger will automatically post your pre-posted article, at the time and date you had wanted it to be posted.  One more thing you can do is leave a marquee note for your readers, informing that you will not be able to respond to their comments, due to your vacations, but you will still be posting new articles everyday.. or whenever you have pre-scheduled it.
It's easy, it's simple, and it's fun: Try it:

To make use of this feature, just click POST OPTIONS at the left-bottom corner of the post editor and set the date and time in the future which you want to schedule the post to publish the post, then click the PUBLISH POST button: Your article will be now set to auto-publish mode in the future, time and date mentioned by you.

Please Click on the image for an enlarged view.

Wednesday, October 15, 2008

Top 5 Posts (Weekly)